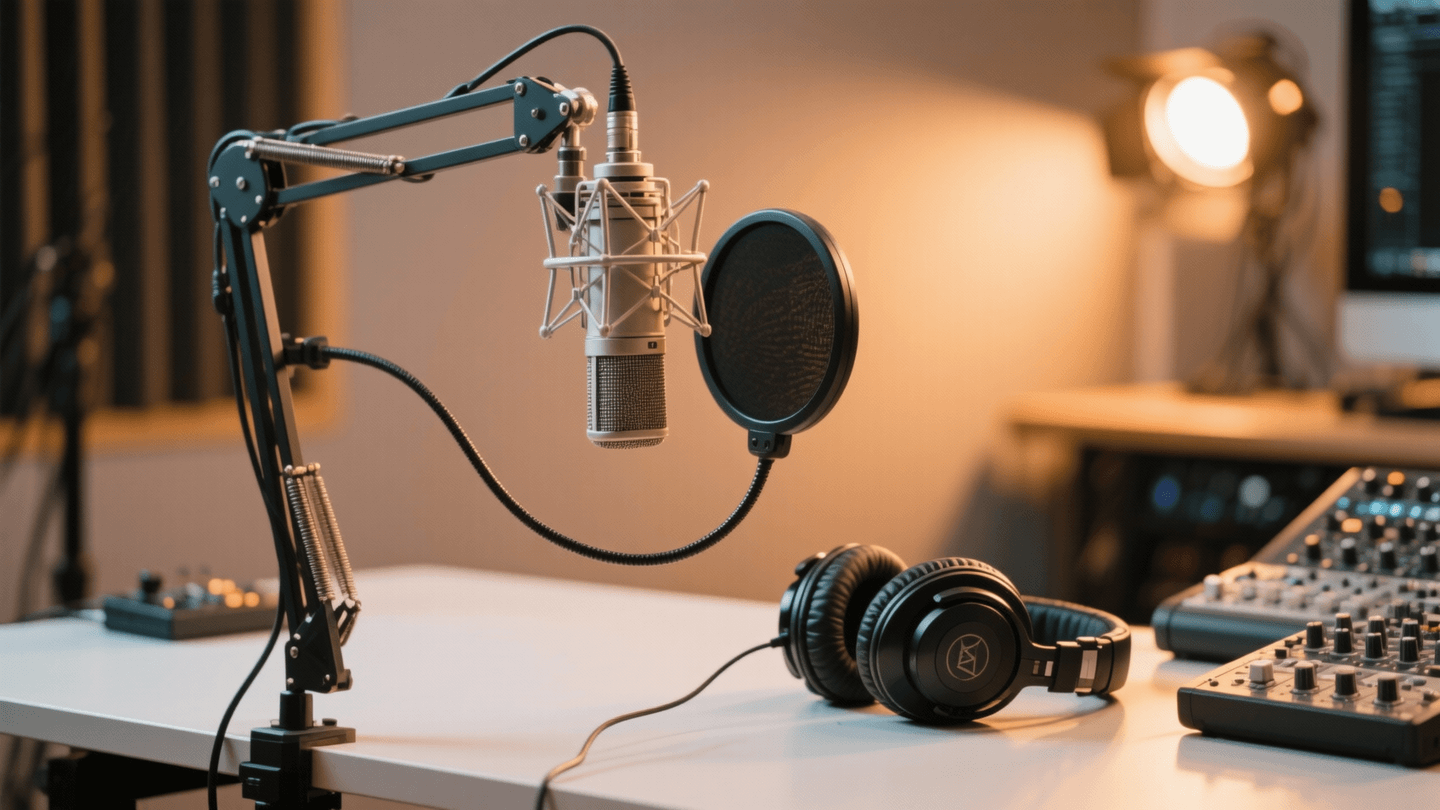
I’ve bought nine microphones in the last four years. Nine. Some of them are collecting dust in a drawer. One got returned after a single recording session because it picked up my neighbor’s dog through a closed window. Another sounded great in the store demo but turned my home office into an echo chamber.
Here’s what I’ve learned the hard way: audio quality is the single biggest separator between content that feels amateur and content that feels professional. Not your camera. Not your lighting. Not your editing software. Your microphone.
Viewers will sit through 720p video without blinking. They’ll watch shaky handheld footage. But the second your audio sounds like you’re recording inside a tin can, they’re gone. A 2025 study from Riverside.fm found that 62% of podcast listeners abandon an episode within the first 90 seconds if the audio quality is poor. YouTube’s own creator research backs this up — watch time drops by nearly 25% when audio is noticeably worse than what audiences have come to expect.
So I’ve spent the last three months testing six microphones that I think represent the best options across budgets and use cases in 2026. I’ve recorded voice samples, measured background noise rejection, tested them in untreated rooms, and scoured Reddit threads for long-term ownership experiences. Let’s get into it.
On this page
- Quick Verdict: The 6 Best Microphones for Creators in 2026
- Individual Reviews
- Shure MV7+ (~$269) — The One I Keep Coming Back To
- Rode PodMic USB (~$179) — Broadcast Voice on a Mid-Range Budget
- Elgato Wave DX + Interface (~$229 total) — The Streamer’s Upgrade Path
- Blue Yeti X (~$149) — The Familiar Face, Still Hanging On
- Fifine K688 (~$59) — The Budget King That Punches Way Up
- Rode Wireless GO II (~$299) — Freedom From Your Desk
- USB vs XLR: The Decision That Actually Matters
- Room Treatment on a Budget: Where Your Money Actually Goes the Furthest
- My Recommendations by Content Type
- Frequently Asked Questions
Quick Verdict: The 6 Best Microphones for Creators in 2026
| Microphone | Price | Connection | Best For | My Rating |
|---|---|---|---|---|
| Shure MV7+ | ~$269 | USB-C / XLR | All-around best for serious creators | 9.2/10 |
| Rode PodMic USB | ~$179 | USB-C / XLR | Podcasters who want broadcast tone | 8.8/10 |
| Elgato Wave DX + Interface | ~$229 total | XLR | Streamers upgrading from a headset mic | 8.5/10 |
| Blue Yeti X | ~$149 | USB | Budget YouTube talking heads | 7.9/10 |
| Fifine K688 | ~$59 | USB / XLR | Best under $100, period | 8.3/10 |
| Rode Wireless GO II | ~$299 | Wireless | Interviews, on-location, run-and-gun | 8.7/10 |
Individual Reviews
Shure MV7+ (~$269) — The One I Keep Coming Back To
The MV7+ is the updated version of what was already the default recommendation in creator circles, and Shure didn’t mess it up. The original MV7 was everywhere for a reason. The plus model adds improved onboard DSP, a slightly hotter preamp on the XLR side, and auto-leveling that actually works without squashing your dynamics into oblivion.
Sound quality: Rich, warm, and present. It’s a dynamic mic, so it naturally rejects more room noise than a condenser. My voice sits right in the mix without much EQ work — maybe a gentle high-shelf boost around 8kHz if I want extra clarity, but it’s genuinely good out of the box.
Setup: Plug in USB-C and it just works. The ShurePlus MOTIV app gives you tone shaping, compression, and a limiter. On XLR, you’ll need a decent interface with enough gain (at least 55-60dB), but the MV7+ is noticeably easier to drive than something like an SM7B.
Noise rejection: This is where the MV7+ earns its keep. In my untreated home office with a window AC unit running, the MV7+ barely picks up any ambient noise at a 2-3 inch working distance. It’s not magic, but the tight cardioid pattern does serious work.
The Reddit consensus: The MV7 line is practically the unofficial mic of r/podcasting at this point.
“Bought an MV7 two years ago, upgraded to the MV7+ last month. The auto-level feature alone was worth it. I record in my living room and my editor said my audio got noticeably cleaner.” — u/podcraft_mike, r/podcasting
“I’ve tried the MV7+ on both USB and XLR through a Focusrite Scarlett. Honestly? USB mode is like 90% as good for most people. Save the interface money unless you’re running multiple mics.” — u/audio_nerd_42, r/audio
Bottom line: If you want one mic that handles everything and you don’t want to think about it too much, this is still the answer in 2026.
Rode PodMic USB (~$179) — Broadcast Voice on a Mid-Range Budget
Rode took their well-regarded PodMic and added a USB-C output. Smart move. The result is a mic that sounds like it belongs in a radio station but plugs straight into your laptop.
Sound quality: Slightly darker and more “broadcast-y” than the MV7+. There’s a pronounced low-mid warmth that works beautifully for deeper voices. If you have a higher-pitched voice, you might want to add a bit of EQ presence boost. The internal DSP includes Rode’s APHEX processing — a subtle exciter and compressor that can be toggled on or off.
Setup: Dead simple. The integrated USB-C means no adapter hunting. It also has XLR if you outgrow USB down the road. One minor gripe: it’s heavy. You need a sturdy boom arm. The cheap $20 Amazon arms will slowly droop under its weight. I’d pair it with the Rode PSA1+ or a Fifine boom arm at minimum.
Noise rejection: Excellent. End-address dynamic pattern means you talk into the end of the mic, and it ignores almost everything off-axis. My mechanical keyboard was nearly inaudible at a 3-inch distance.
“Switched from a Yeti to the PodMic USB and it’s night and day. My co-host said I finally sound like I know what I’m doing.” — u/talkshow_terry, r/podcasting
Bottom line: Best broadcast tone under $200. If you’re a podcaster first and everything else second, this might actually be a better fit than the MV7+.
Elgato Wave DX + Interface (~$229 total) — The Streamer’s Upgrade Path
The Wave DX is XLR-only, which means you need an interface. Elgato’s own Wave XLR interface runs about $130, putting the combo around $229 if you find the DX on sale (~$99). Alternatively, pair it with a Focusrite Scarlett Solo for a similar total.
Sound quality: Clean, neutral, and detailed. Less colored than the Rode or Shure — this mic doesn’t impose a “sound” on your voice, which makes it versatile. It works well for both voice and if you occasionally record acoustic instruments.
Setup: This is the one trade-off. XLR means an interface, means more cables, means more desk space. If you’re already running a streaming setup with a GoXLR or similar mixer, the DX slots right in. If you’re starting from scratch, the extra complexity is real.
Noise rejection: Good but not class-leading. It’s a dynamic mic so it inherently rejects more than a condenser, but the Shure and Rode both have tighter patterns in my testing. In a noisy room, you’ll want to be closer to the DX — 1-2 inches is the sweet spot.
“Wave DX into a GoXLR Mini. Chat said my audio sounded professional for the first time. Previously was on a HyperX QuadCast.” — u/streaming_sarah, r/Twitch
Bottom line: Great mic if you’re already in the XLR ecosystem or building a stream setup where you want hardware control over your audio chain.
Blue Yeti X (~$149) — The Familiar Face, Still Hanging On
Look, the Yeti gets a lot of hate online, and some of it is deserved. It’s a condenser mic, which means it picks up everything — your keyboard, your roommate, the truck outside. But the Yeti X (not the original Yeti, not the Yeti Nano — the X specifically) has better capsules and onboard metering that makes it more manageable.
Sound quality: Bright and detailed. It’s a condenser, so it captures more nuance and breathiness in your voice compared to the dynamics on this list. Some people love that. For ASMR-adjacent content or soft-spoken narration, it’s actually a strength.
Setup: USB plug-and-play. Blue’s Sherpa software (updated in late 2025) handles gain, EQ, compression. The multi-pattern selection (cardioid, omni, stereo, bidirectional) is genuinely useful if you do interviews in person.
Noise rejection: This is the Yeti’s weakness. In cardioid mode it’s acceptable, but you absolutely need some room treatment. Recording in an untreated room with hard walls and a Yeti X is going to sound roomy. There’s no getting around the physics.
“The Yeti X is fine if you treat your room. I hung $30 worth of moving blankets and it went from ‘echoey mess’ to ‘totally usable.’ People overcomplicate this.” — u/budget_audio_guy, r/YouTubers
Bottom line: If you already own one, don’t rush to replace it — treat your room first. If you’re buying new, the Fifine K688 gives you dynamic-mic noise rejection for less than half the price.
Fifine K688 (~$59) — The Budget King That Punches Way Up
This mic has no business sounding this good at $59. I bought it expecting to write a polite paragraph about it being “decent for the price.” Instead, it’s become the mic I recommend to every friend who asks “what should I start with?”
Sound quality: Warm, slightly mid-forward, and surprisingly full. It doesn’t have the low-end richness of the MV7+ or the broadcast polish of the PodMic, but in a blind test I ran with three friends, two of them couldn’t reliably tell the K688 apart from the Shure on spoken word. At one-fifth the price.
Setup: USB-C and XLR dual output, just like the big names. The included pop filter and shock mount are basic but functional. No companion software, which is either a pro or a con depending on how you feel about installing more apps.
Noise rejection: Dynamic cardioid pattern does its job. Keyboard noise, room echo, and AC hum are all well-controlled at a normal working distance. Not quite as tight as the Shure, but genuinely impressive for the price.
“K688 is the best kept secret in budget audio. I’ve been podcasting with it for 8 months and nobody has ever complained about my sound quality.” — u/frugal_podcaster, r/podcasting
“Bought this as a placeholder until I could afford a PodMic. Never ended up upgrading. It’s that good.” — u/diy_content, r/YouTubers
Bottom line: If you’re starting out, just buy this. Seriously. Put the money you save toward a decent boom arm and some acoustic treatment. You’ll sound better than someone who spent $300 on a mic in a bad room.
Rode Wireless GO II (~$299) — Freedom From Your Desk
Different category, different use case. The Wireless GO II is a clip-on wireless system with two transmitters and one receiver. If you do interviews, outdoor shoots, walking vlogs, or anything where you can’t be tethered to a desk, this is the standard for a reason.
Sound quality: The built-in mics on the transmitters are surprisingly good — clear, natural, slightly thin compared to a proper desk mic but totally broadcast-ready for field recording. You can also plug in lavalier mics for even better quality.
Setup: Pair the transmitters to the receiver, clip them on, go. The onboard recording feature (each transmitter records a local backup) has saved me twice when wireless interference caused dropouts. Battery life runs about 7 hours, which is enough for a full day of shooting.
Noise rejection: Depends entirely on your environment. The built-in mics are omnidirectional, so they’ll pick up ambient noise. In a quiet indoor setting, great. At a coffee shop or convention floor, you’ll want the lav mic option and to get it close to your subject’s mouth.
“Did 47 interviews at a convention with the Wireless GO II. Not a single unusable recording. The backup recording feature is a lifesaver.” — u/convention_creator, r/YouTubers
Bottom line: Not a replacement for a desk mic, but an essential addition if your content ever leaves your room.
USB vs XLR: The Decision That Actually Matters
This is the fork in the road that trips up more new creators than any other gear decision, so let me be direct.
Choose USB if:
- You’re recording one person (yourself)
- You want minimal setup and fewer things to troubleshoot
- You don’t want to spend extra on an audio interface
- You value portability (laptop recording on the go)
Choose XLR if:
- You’re recording multiple people and need separate tracks
- You want hardware control (physical knobs for gain, EQ, effects)
- You plan to upgrade your signal chain over time
- You’re running a streaming setup with a mixer
Here’s the thing most gear forums won’t tell you: USB audio quality in 2026 is genuinely excellent. The built-in converters and preamps in mics like the MV7+ and PodMic USB rival budget interfaces. The gap between a $179 USB mic and a $179 mic plus a $100 interface is smaller than it’s ever been.
The real advantage of XLR is flexibility and control, not raw sound quality. If you’re a solo YouTuber recording in your office, USB is the pragmatic choice. If you’re building a podcast studio with two or three hosts, XLR with a multi-channel interface is the way to go.
If you’re building out a full desk setup, I covered interface placement and cable management in my ultimate productivity desk setup guide — a clean signal chain starts with a clean workspace.
Room Treatment on a Budget: Where Your Money Actually Goes the Furthest
I’m going to say something that might sting: a $59 mic in a treated room will sound better than a $300 mic in an untreated room. I’ve tested this. It’s not close.
You don’t need to spend hundreds on professional acoustic panels. Here’s what actually works:
The closet method ($0). Record in a closet full of clothes. The hanging fabric absorbs reflections. It’s ugly, it’s cramped, and it sounds shockingly good. I recorded my first 30 podcast episodes in a closet. Nobody knew.
Moving blankets ($25-40). Hang two or three heavy moving blankets on the walls behind and to the sides of your mic. The thick, dense fabric kills reflections in the mid and high frequencies where voice lives. Attach them with Command hooks if you’re renting.
Foam panels ($40-60 for a 12-pack). The classic option. Put them at your first reflection points — the walls directly to your left, right, and behind your monitor. Don’t bother covering the ceiling unless your room is really bad. And skip the egg-crate foam; it’s basically decorative at the frequencies that matter.
The bookshelf trick ($0). A bookshelf full of irregularly sized books is a surprisingly effective diffuser. If you have one, put it behind your mic. Free acoustic treatment.
DIY absorption panels ($15-20 each). Rigid fiberglass insulation (Owens Corning 703) wrapped in fabric and hung on the wall. This is what actual studios use, just prettier. Four of these panels transformed my office from a reverb nightmare to a usable recording space.
The order of priority: treat behind you first (what the mic “sees”), then the sides, then behind the mic. Most creators over-treat the area behind the mic and ignore the wall behind them, which is backwards.
My Recommendations by Content Type
Solo podcast: Shure MV7+ on USB. Plug in, open your DAW, hit record. If you’re on a budget, the Fifine K688 gets you 85% of the way there for a fifth of the price.
Multi-host podcast (2-3 people): Rode PodMic USB for each host into a multi-channel interface, or individual USB mics into separate tracks via software like Riverside or Zencastr. The PodMic’s broadcast tone makes everyone sound good with minimal post-processing.
YouTube talking head: Shure MV7+ or Fifine K688 on a boom arm, positioned just out of frame. Pair it with a solid webcam — I’ll be covering the best webcams for video calls soon, so keep an eye out for that.
Twitch/streaming: Elgato Wave DX if you want hardware control through a GoXLR or similar, or the MV7+ on USB if you want simplicity. Streamers need reliable noise rejection because you’re live — there’s no fixing it in post.
On-the-go interviews and field recording: Rode Wireless GO II, no contest. Clip it on your subject, hit record, and stop worrying about it.
Just starting out, not sure yet: Fifine K688. It’s $59. If you decide content creation isn’t for you, you’re out less than the cost of a dinner. If you stick with it, it’ll serve you well for a long time, and you’ll eventually know exactly what you want to upgrade to.
If you’re also building out your broader tech stack for creating content, getting the audio foundation right first makes everything else easier.
Frequently Asked Questions
Do I need a pop filter?
For dynamic mics at a close working distance, yes — a basic foam windscreen or a mesh pop filter keeps plosives (hard P and B sounds) from ruining your takes. Most of the mics on this list include one or have one built into the grille design. The Fifine K688 comes with one. The MV7+ has an integrated windscreen that handles most plosives on its own.
How close should I be to the mic?
For dynamic mics: 2-4 inches. This is closer than most beginners think. The proximity effect (bass boost when you’re close) is your friend with dynamic mics — it adds warmth and body. For condenser mics like the Yeti X: 6-8 inches to avoid overwhelming the capsule.
Can I use these mics for music?
The MV7+ and Yeti X are both reasonable for recording vocals and acoustic instruments in a home setting. The Elgato Wave DX’s neutral profile also makes it a decent all-rounder. None of these replace a dedicated large-diaphragm condenser for serious music production, but for singer-songwriter demos or layering vocals on a YouTube track, they’ll do the job.
Is the Shure SM7B still worth it in 2026?
The SM7B is a legendary mic, but it’s $399 and requires a beefy interface (or a CloudLifter, adding another $100+). For pure voice recording, the MV7+ gets you very close to that sound for less money and with USB convenience. The SM7B still has an edge for music vocals and if you’re running it through a high-end signal chain, but for creator use cases, the MV7+ is the smarter buy.
My recordings sound echoey. Is it the mic’s fault?
Almost certainly not. It’s your room. Re-read the room treatment section above. Even a few blankets draped strategically will make a dramatic difference. I’ve seen people go through three or four mic upgrades trying to fix a problem that $30 in moving blankets would have solved.
What boom arm should I get?
The Rode PSA1+ ($99) is the gold standard — smooth, sturdy, and handles heavy mics without sagging. On a budget, the Fifine boom arm ($25) is honestly good enough for mics under 1.5 pounds. Avoid the cheapest no-name arms on Amazon; they tend to develop creaking noises within a few months that your mic will absolutely pick up.
Have a mic recommendation I missed, or want me to test a specific model? Drop me a line. I’m always looking for an excuse to buy another microphone — my drawer apparently has room for a tenth.

: 5 Picks for Solo Creators Under $800")
